
DIY repair for Sennheiser HD-580 Headband foam pad
Last updated 10 March 2011
The foam pad fitted to the headband on my Sennheiser headphones were looking very flat after around 10 years of occasional use. A replacement foam pad appears to cost around £12 plus delivery in the UK.
This page briefly describes how to replace the stuffing used in the foam pad for almost next to nothing. I believe the HD-600 uses the same headband foam pad.
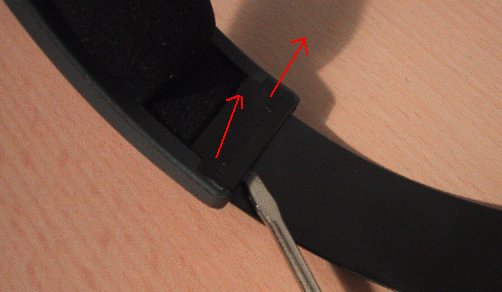
The foam pad is very easy to remove from the HD-580 headband (I believe the HD-600 and HD-650 may be similar, but beware that other models such as the HD-565 differs). Extend the headband and then simply use a flat blade like the end of a dining knife and carefully insert it between the thin black plastic clip and the steel band at one end of the headband. Carefully lever off the black plastic clip as shown in the following pictures.
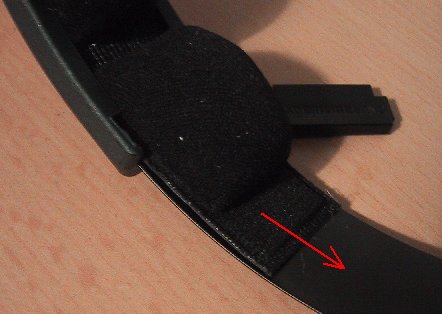
The foam pad can now be removed by sliding it off.
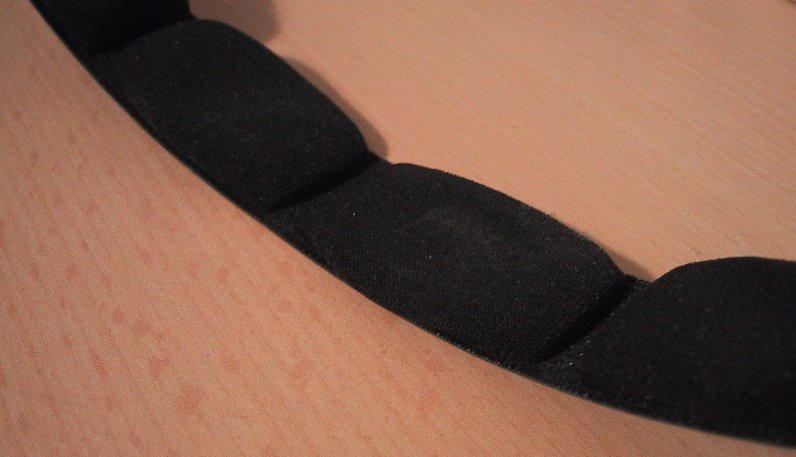
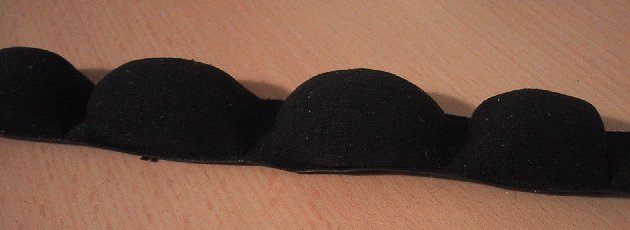
This photo shows the deflated cloth covered foam cushions.
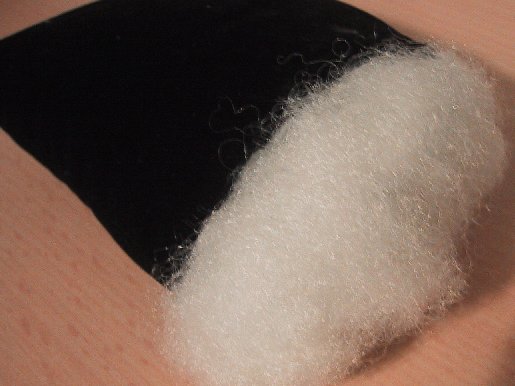
I was originally was going to use some upholstery grade or packaging foam to repair the pad, but then came across a wristwatch box which contained a small black cushion. The wadding within the cushion looked ideal for repairing the headband pad. It appears to be some sort of hollow fibre, perhaps identical to what is used in pillows.
The next step was a bit more tricky. I had to cut an opening behind each of the four cushions, to allow me to remove the old stuffing and then permit me to insert the new wadding.
You can see my first botched attempt in the far left of the next photograph.
My subsequent attempts were more successful.
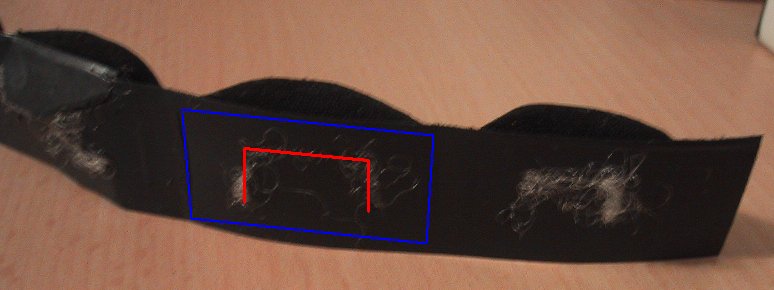
The back of the foam pad is made of a thin stiff plastic material. The blue rectangle shows the outline of the rear of one of the cushions. I used a craft knife to pierce and cut a horizontal slit taking care not to damage the flexible cloth on the other side. Then I expanded the slit by using precision cutters to create the red coloured inverted 'U' shape flap as shown below. Ensure the flap you have created is kept well away from the edges of the pad (blue rectangle).
Once I had created the opening flap, I was able to carefully remove all of the perished foam from within the cushion. This pad was about 10 years old, as a result, the foam had completely disintegrated so it wasn't too difficult to remove the crumbly remains by pushing it through the flap from the cloth covered side of the cushion.
I then just filled the cushion with the new wadding. A small blunt stick is useful to help push the wadding into the cavity. You can see some of the white wadding in the above photo protruding through the flaps.
This process was repeated for all four cushions.
The final step was to cover the back of the pad with a single long strip of PVC electrical sticky tape. You could also use packing tape. The tape I used was about 19mm wide. Do not use any wider tape as you may have difficulty refitting the pad into the headband.
The whole repair was completed in well under 30 minutes.
Here's the final result.

I may also look at whether it is feasible to refurbish the ear pad cushions after discovering the cost of replacement pads is up to £60 in the UK - daylight robbery springs to mind..... (New ear pads for the later HD-5x5 are a more reasonable £20) The velvet covering and the flat foam are in very good cosmetic condition, but the foam within the cushion is compressed.
How to replace the foam in the HD-580 earpad cushions for 99 pence !
Originally posted in AVforums.com